


Hardware components | ||||||
 |
| × | 1 | |||
| × | 1 | ||||
 |
| × | 1 | |||
 |
| × | 1 | |||
 |
| × | 1 | |||
 |
| × | 1 | |||
 |
| × | 1 | |||
| × | 1 | ||||
Software apps and online services | ||||||
 |
| |||||
Hand tools and fabrication machines | ||||||
 |
| |||||
My father has been blind for years, and just like my mother is already in his old age. With the years of a senior, the danger increases in the daily solitude of the one thing or another thing to overlook. It threatens a fall and panics: what is now to be done? Is the hospital car called or can the familiar situation of a family member, a friend or a neighbors manage the situation again and again?
My parents have no Internet access (which is actually) and are not used to dealing with smartphones (the numbers can be found bad).
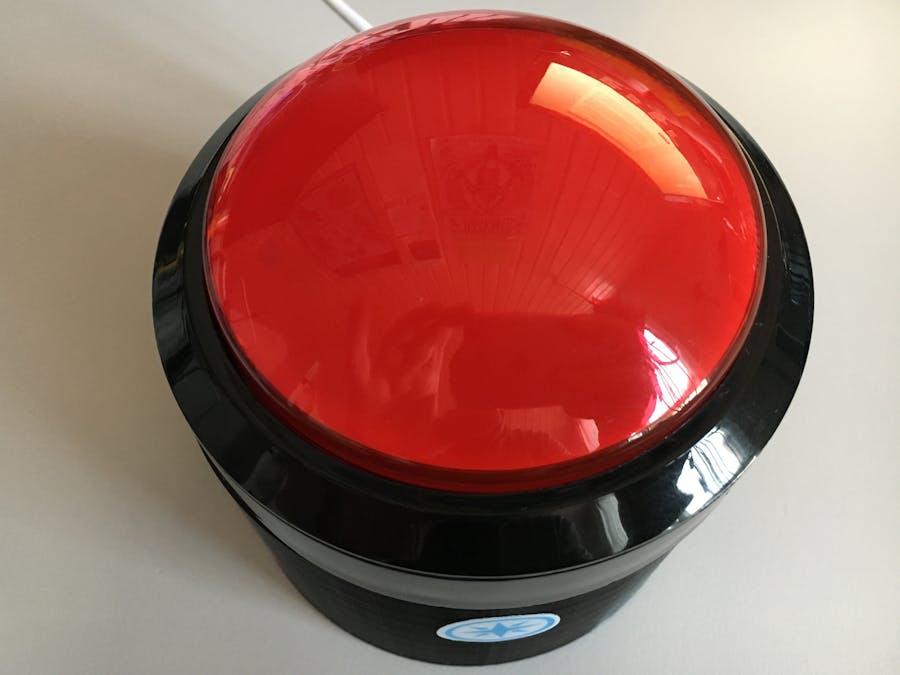
A solution: "Press the big button and I will call you immediately!"
The idea was born, the shopping list ordered and a similar project found for the adaptation.
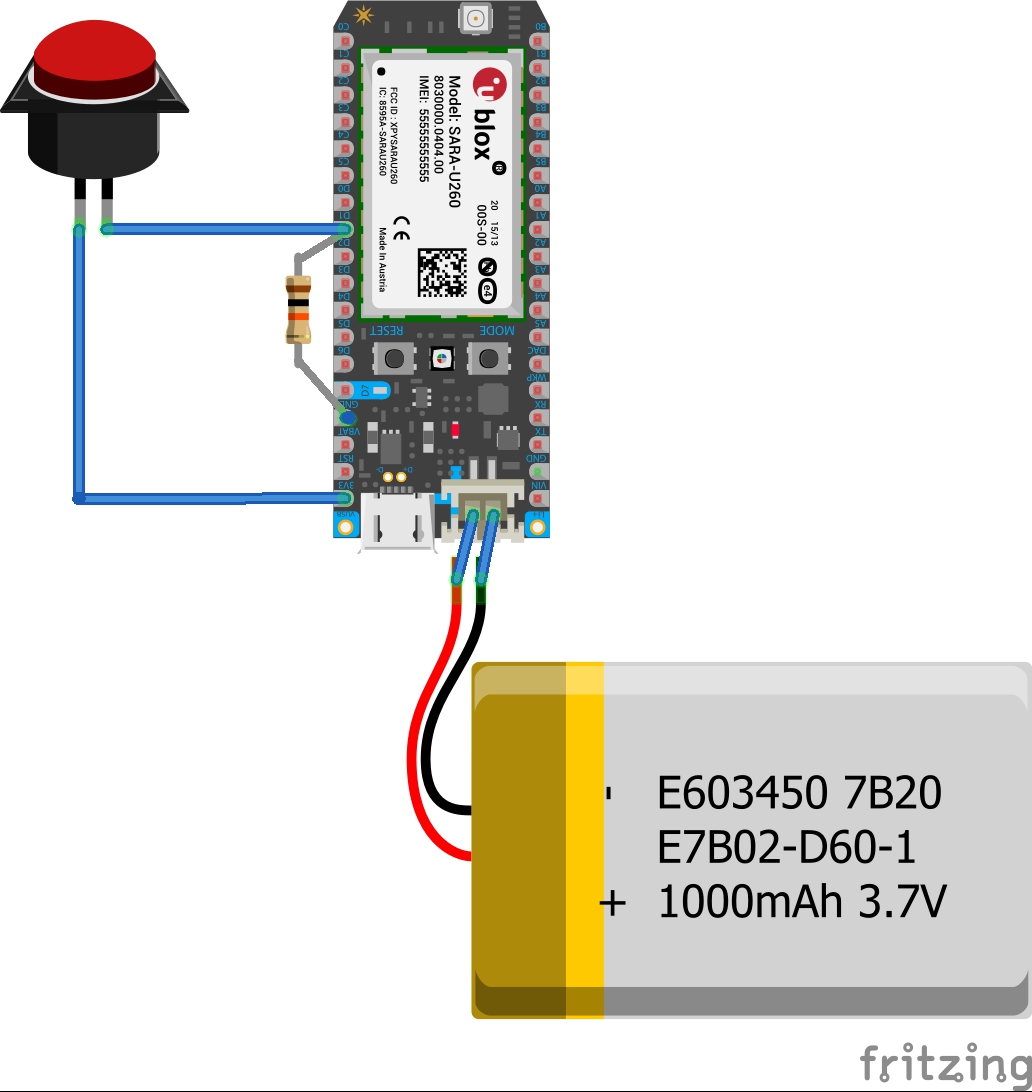
The implementation was carried out using a Spark Cores and wired up with crocodile clips, in order to be able to transmit the firmware updates via WiFi. As it turned out, the pin D0 had a crack and (my own Core) did not work. Details you can read here.
With the use of the Electron I am not dependent on WiFi in the house of my parents and can trigger a signaling using the IFTTT service in conjunction with the Particle Cloud:
New event publishedThis Trigger fires when an interesting event comes from a particular device. Send events using Particle.publish.
Particle.publish("Emergency-Button", "Button pressed!", PRIVATE);
The result within the log of the Particle Cloud:
For technical implementation, these points must be observed:
- first focus on the micro switch: the colored side is plus.
- replace the original LED with a 12V voltage resistor through another LED with a soldered 470 Ohm.
Areas of application can also arise in the own household: the cook no longer calls through the house that the meal is directed, but informs the family via the button. The toddler is afraid of the dark in the children's room and may not fall asleep: here the button can serve as a steady light source. In this case wire the internal LED to VIN and put D4 from Electron to 3.3V = light always on and powered via USB and LiPo Battery.
I recommend the 3D housing from the adaptation: it has the size 100 x 60 mm and takes the Microswitch (which is quite long with its screw thread) completely. I have an Enclosure for around 20 euros about the 3DHubs service to make ready and come in the end to a sum of about 110 euros (70 euro electron, 10 euro LiPo battery and 10 euro button).
Not too expensive when it comes to your own parents, right?
Update 25.10.2017Today we visited my parents near Marburg / Lahn, Germany and explained to my parents the "Emergency Button". It now has a place in the kitchen and is permanently powered by the USB charger.


Comments