


Hardware components | ||||||
 |
| × | 1 | |||
Software apps and online services | ||||||
| ||||||
One of the most important things you can carry with you is knowledge. When we need to look something up many of us default to Wikipedia. But what if your network connection fails or if you are in a foreign country and your mobile phone provider would bill you unspeakable amounts for each kilobyte you download? You can either try to find your answer by other means or you can come prepared.
I have always been a fan of technology that does not requires the internet to work, after all it is one of the most fragile technologies we have. Turns out there are applications for an offline Wikipedia. And turns out, they run on the CHIP!
This project focuses on Wikipedia, but there are other useful libraries to carry with you including dictionaries and other languages of the Wikipedia articles.
Instructions
Markdown**Note** This is available for your web browser here: http://home.ayra.ch/md/doc/offline-wiki
# The Hitchhiker's Guide to the Galaxy
Or how to carry a copy of the entire english wikipedia in your pocket. Information at your fingertips.
# What is this
This document describes how you can carry the entire set of the english wikipedia with you. It essentially allows you to have most of the important human knowledge plus the article about Donald Trump in your hands, always available, as long as the internal battery isn't dead.
# Computer Knowledge
We expect that you have a basic understanding of file/folder structures and are not scared to run commands in a terminal. The manual is kept as simple as possible and you usually find the exact commands to type provided here. Unless you start removing random files on your linux system, there is almost no damage you can do to it. In the worst case you just have to reinstall the operating system.
## Understanding Linux
If you have never worked with linux you have to wrap your head around a few things:
- **Terminals** The text terminal of a linux machine is way more powerful than the one (`CMD`) provided in Windows. Primary reason for that is, that a graphical user interface is not an essential component in a Linux installation and in fact, most Linux servers lack one. You can do about everything on the terminal.
- **Virtual File system** In Linux you do not have the concept of drive letters. Everything starts at the root directory (`/`) and build on top of it. There is for example the folder `/dev` which holds links to almost all devices that are somehow connected to the system. The directory is purely virtual and does not exists on a disk. Because everything is organized in directories and files you can essentially browse the computer as if it was a big disk. As an example `cat /proc/uptime` will show you how long your Linux system has been powered on. You can repeat the command and you will see that the number it shows is increasing. You can read about this concept in the [Everything is a File](https://en.wikipedia.org/wiki/Everything_is_a_file) entry on Wikipedia.
- **Text files** Most stuff that is exposed on the virtual file system on Linux is provided in the form of text files. This makes editing and displaying them easier, but because you edit them manually most of the time instead of using a specific tool you have to be very careful to not make any mistakes. Depending on how the program that needs the file is programmed it will either ignore the faulty lines, ignore the file completely and use defaults or completely fail to start.
- **Case sensitivity** names in Linux are case sensitive. In Windows, it does not matters if you use uppercase or lowercase in commands, file and directory names, in Linux it does. Usually everything is lowercase to keep it simple.
# Preparations
You need multiple things for this:
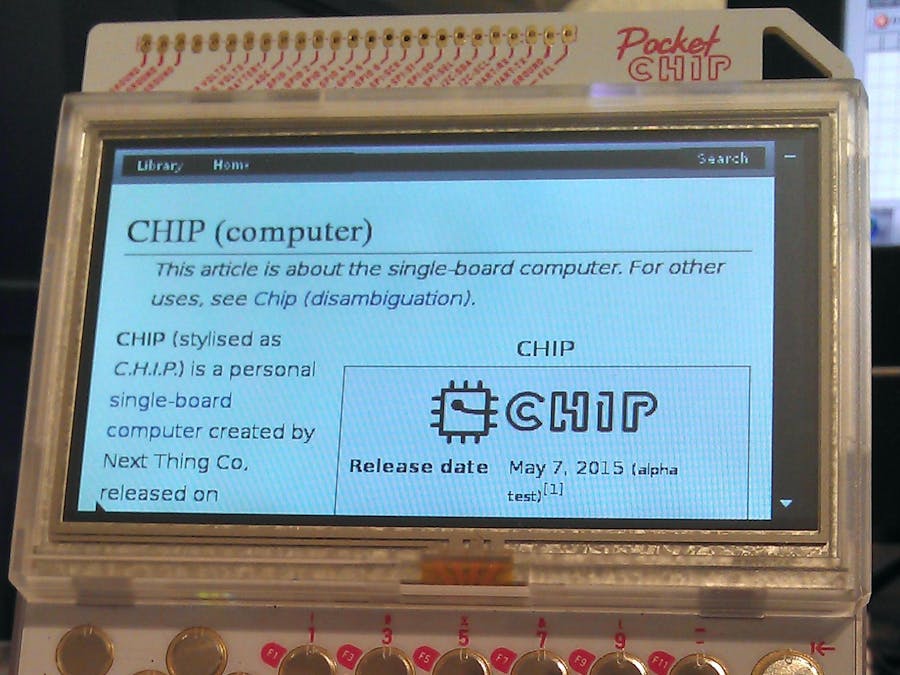
- **A portable device that runs debian linux** I used the [Pocket CHIP](https://getchip.com/pages/pocketchip), mainly because I got it from Kickstarter a while back, but also because it is the ideal device. It comes with its own screen, keyboard and battery and thus is ideal for portable use. It also has integrated WiFi. The computer chip itself is removable from the casing and can be used with a HDMI extension board if you prefer. You essentially get a handheld computer for 69$.
- **USB flash drive to hold the libraries**. For this I bought a cheap SanDisk Flash drive with 128GB capacity. If you want to use a 64GB drive, then you either can't use the full text search index (saves 12 GB). Or you download the version that lacks most media content (images, videos, audio) (saves 30 GB). **I highly advice against using an external hard drive due to the massively higher power consumption**.
- **Internet connection**. The faster the better because you are going to download a lot. This is obviously only needed for the download of the catalog. You do not need it for the catalog itself to work.
- **A Host computer**. You can do everything on the CHIP itself, but I recommend you use a regular computer for the preparations, especially for the index generation. My host computer is a Windows machine but on Linux it should work in a similar fashion.
## Information regarding Raspberry Pi
If you go with the [Raspberry Pi](https://www.raspberrypi.org/) instead of the CHIP, you can install everything on the SD card, provided it is large enough. Somebody managed to get a 512GB card working. [Here](http://elinux.org/RPi_SD_cards) is a list of cards known to work. In that case you don't have to do the weird stuff with the `mount` command and the `/etc/fstab` file.
# Overview of Steps
The basic steps needed to have wikipedia running are as follows:
- Download the library onto the USB stick
- Insert the USB stick into the CHIP and mount it.
- Launch the server.
- Launch the Browser.
I go through all these and more in detail below. We will setup the device to mount the USB drive automatically and put the server and browser start into a single script file.
# Step 1: Downloading the library
You should definitely start with this step because it is most likely going to be the slowest to complete, but it allows you to work on other steps while it progresses.
## The Wikipedia library itself
This is surprisingly easy, go to [Kiwix Content Index](http://www.kiwix.org/wiki/Content_in_all_languages) and download the wikipedia library in your chosen language. If you download the pre-indexed version you can essentially trade processing power against Internet Bandwidth.
After the Download, extract the zip archive. Whatever is in there, you essentially only need the `data` folder, which holds 3 subdirectories. So it is up to you if you extract everything or just that folder. If you download the non-indexed version, the `data` folder might only have 2 subdirectories.
### Creating an index yourself
If you download the non-indexed version and you want to create a full text search index, then also [download the Kiwix executable](http://www.kiwix.org/wiki/Software) for your Host operating system. Launch the application and in the edit menu, set the profile path to the extracted data folder. Then open the wikipedia library (book stack icon on top left) and confirm that you want to create an index. This can take a few hours.
## Copy to the USB drive
Once you are happy with your library, put it on the USB drive. You do not need to copy the `data` folder itself, just its content. For the library to work properly, you should reformat the drive using the "exfat" file system.
After you copied everything to the USB drive, go into the library folder there and rename the xml file to `wikipedia.xml`. If your system is configured not to show file extensions (the `.xml` is not visible) then just name it `wikipedia`. If you decide to not rename the file, you have to adjust for that in the launch script we create later.
## kiwix-serve
Download and copy of [kiwix-serve](http://www.kiwix.org/wiki/Kiwix-serve#Get_it). The download is a tar.bz2 archive. It is up to you if you extract it on Windows (requires [7-Zip](http://7-zip.org)) or on the target device. You only need the `kiwix-serve` file out of it. To extract it on the target device, use the command `tar -jxf filename.tar.bz2` inside an empty directory. Later we assume that `kiwix-serve` is inside a `kiwix` folder in your home directory, so copy the archive into there before running the command.
## Formatting the USB drive
If you buy a new flash drive, they usually come FAT32 formatted, which has a rather restrictive limit on the maximum file size. Your search index is most likely going to exceed this. You will notice this if you try to copy it over to the drive and receive weird error messages.
Under Windows, go to "My Computer" and click with the right mouse button on the flash drive and select "format". Now choose "ExFAT" and the default allocation block size. Make sure, the quick format option is checked or you are going to wait a long time. Once completed, you can use the drive as usual.
# Step 2: Linux preparations
While the download is running, we prepare the linux machine. It is up to you if you use the local terminal or connect via ssh. In the case of the CHIP, I recommend ssh because the internal keyboard is rather flimsy to work with. If your host uses Windows, you can use [PuTTY](http://www.chiark.greenend.org.uk/~sgtatham/putty/download.html) to connect to a console session (to type commands) or [FileZilla FTP client](https://filezilla-project.org/download.php?show_all=1) to transfer files. You can open multiple connections of each type at the same time.
## Generic commands
Here is a list of generic commands you might find useful. Most of them provide additional help if you use the argument `--help` or if you use `man COMMAND`, for example `man nano`.
- **ls** List content of your current directory. You can provide an alternative path and/or filter mask to list its contents or only specific files. Wildcards `*` (0 or more chars) and `?` (exactly 1 char) can be used. Example: `ls /media/kiwix/library/*.zim` shows all files that end in `.zim` and are located in the folder `/media/kiwix/library`
- **cd** Changes into another directory. You can use a full path like `/dev` to enter a specific directory or a relative path `kiwix` to enter a specific directory that is searched relative to your current location. If you do not enter any path, you will end up in your home directory (`~`). You can supply `..` to move one level up, so `../test` will move one level up and then enters the test directory.
- **mkdir** This creates a directory. Similar to `cd` it accepts full or relative paths.
- **rm** Removes a file/directory. Similar to `cd` it accepts full or relative paths.
- **cp** Copies a file somewhere else. This does not work with non-empty directories unless you use the `-r` argument. Takes source and destination as additional arguments.
- **mv** Moves a file or directory somewhere else. Takes two arguments, source and destination.
- **nano** Edits a file. If the given argument links to a location that does not exists, a new file is created.
- **sudo** Performs the following command with elevated privileges. This has to be used whenever changes are made to parts of the system, especially for globally installing software or by editing stuff inside of `/etc`.
- **apt-get** Installs new programs.
- **cat** Shows the content of files. You can supply multiple arguments to show multiple files after each other with the added confusion of where one ends and the next begins.
- **exit** Closes the terminal causing various effects: On an SSH connection, the connection is closed. If you use this locally, the terminal is closed. This returns you to the desktop. If there is no desktop, then it logs you out.
- **man** Provides detailed help to a command. You can scroll using the arrow keys and exit with `q`
## Tab completion
If you hit the `[TAB]` key, the terminal will attempt to autocomplete the command you type. This can also be used for path and file name completion. The feature is intelligent and will only complete what is guaranteed to work. If you have a directory `testdir` and a file `testfile`, typing `t` and then attempt to complete the name, it will only complete the `test` part because this guaranteed to be needed regardless if you are looking for the file or the folder. You can then append the next letter (in this case either `d` or `f`) and then autocomplete again. If you hit tab twice it will show all possibilities. if this would result in a lot of output you are asked before it prints everything. On a more primitive level, this also works in a Windows terminal. Please be aware, that linux is case-sensitive, so the files `Test` and `test` are different. You will however find, that most commands, directories and files are all written in lowercase.
## SSH on the CHIP
If the linux system on the CHIP (which is Debian Jesse by the way) does not comes with the SSH server you can install it using `sudo apt-get -y install openssh-server`. After the setup I recommend either disabling the ssh server, changing the password of your user or switch to key-only login method since the default password might be guessed automatically by software that tries to break into the system.
The Debian wiki has a page about [the configuration of SSH](https://wiki.debian.org/SSH) if you are interested in tweaking it further.
## Install components
You need to install a few things for this to work properly. First, run `sudo apt-get update` and then `sudo apt-get -y install iceweasel udev nano wget exfat-fuse exfat-utils`.
`sudo` will ask for your user password. If you are on CHIP, the default password is `chip`, on the Raspberry pi it is `raspberry`.
For `apt-get` to work you need to be connected to the internet with your device.
## About the installed tools
- **iceweasel** This is essentially a version of firefox. We use it to browse the wiki later but you can also use it to download any content I ask you to download.
- **udev** We need this to automatically mount the USB drive later.
- **nano** This is a text editor. If you want you can also just transfer files with the USB drive to the host machine and edit there.
- **wget** You can use it to download stuff if you know the direct URL. Just call `wget http://....` and it will put the file into the current directory.
- `exfat-fuse exfat-utils` These two are needed to support the USB drive.
If some tools are already installed, they will be skipped.
## Automount USB
Drives in linux are not mounted by default as they are in windows unless a tool is installed that does this. Mounting means to make it available for use by the user. In Windows this is usually done by assigning a drive letter to the USB storage device. In linux, where everything is exposed to the user in form of a virtual file system, this is instead done by "assigning it a path".
All drives are present in the `/dev` subdirectory. type `ls /dev/sd*` to get a list of all available drives (might be empty). After that, plug in the USB drive, wait 5 seconds and then run that command again. There should now be two additional entries in the form `/dev/sda` and `/dev/sda1`. In case of the CHIP, where the system is installed on the internal flash memory, the USB device will probably use `a`, but it can also have a different letter. If it is different, replace it in the commands below.
Run `sudo mkdir /media/kiwix` and then `udevadm /dev/sda1"`. Search for the value `ID_FS_UUID` in the list and make note of the ID. It is usually in the format `xxxx-xxxx` or `xxxxxxxx-xxxx-xxxx-xxxx-xxxxxxxxxxxx`.
Now edit the fstab file by typing `sudo nano /etc/fstab`.
At the bottom, add this line (but with your UUID): `UUID=XXXX-XXXX /media/kiwix exfat ro 0 0`
The text editor provides various options on the bottom. The caret (`^`) indicates the Control key, so to exit, hit `[CTRL]+[X]`, save is `[CTRL]+[O]`.
Please note that the fstab file is processes during startup, so it is important, that you insert the USB drive before you start the device.
If you plan on having different libraries on different usb devices you can add additional lines (with the respective ids) for each drive you have. You can leave the path `/media/kiwix`for all drives unless you plan on having multiple drives connected at the same time, then each one needs its own path.
## Install kiwix-serve
If you have not already done this in Step 1, type `mkdir ~/kiwix` to create a folder in your home directory. Put `kiwix-serve` there. See the end of Step 1 on how to obtain and extract it. If you type `~/kiwix/kiwix-serve` you should get help output on the terminal. If not, type `chmod u+x ~/kiwix/kiwix-serve` and then try to run it again. If it is still not working, make sure `ls ~/kiwix` shows the `kiwix-serve` file. If it is not there, you probably copied it into the wrong directory.
### Test
If you have done this properly and the USB drive is plugged in and mounted, then you should be able to type the command `~/kiwix/kiwix-serve --library --port=8080 /media/kiwix/library/wikipedia.xml` and it should start up. If it looks like nothing is happening after 5 seconds, then it is working. You can hit `[CTRL]+[C]` to exit the application and return to the terminal.
If you get an error about the library file not being found, make sure the USB drive is properly accessible and that you renamed the xml file as instructed in Step 1.
# Step 3: Start script
Type the command `nano ~/wiki` and then type the following content into the editor:
#/bin/bash
~/kiwix/kiwix-serve --library --port=8080 --daemon /media/kiwix/library/wikipedia.xml
iceweasel http://127.0.0.1:8080
pkill kiwix-serve
Save and exit the editor. Then type `chmod u+x ~/wiki`. This marks the file as being executable. You must do this or it will not run.
now type `nano ~/.bashrc`. Scroll to the end of the file and add this line to it: `alias wiki='~/wiki'`. The reason we do this is to launch the server more easily.
## Using a Text browser
If you prefer to use a text browser (which you can easily use over SSH) first install one `sudo apt-get -y install lynx` and then replace `iceweasel` in the wiki script with `lynx`
# Step 4: Run it
Open a terminal on the CHIP and just type `wiki` to launch the application and open the web browser. When you close the browser, the server automatically exits. You have to type that command on the device itself and not over an SSH connection. In the browser, hit `[F11]` to enter full-screen as the server provides a search bar for you. To exit the browser, hit `[CTRL]+[Q]`
# Step 5: Update
Whenever an update is released, you can copy the new content to the USB drive and insert it back into the CHIP `kiwix-serve` works stateless. There is no cache or anything that will need updating. Just be sure to follow the download procedure from Step 1.


Comments